Homemade Cheez-Its: Chili and Cheddar Crackers

England may be missing many things, but apart from Lucky Charms (marshmallows for breakfast! What's  not to love?), Cheez-Its are perhaps my biggest US food craving. Try and find a similar cracker in the UK and you'll find yourself fruitlessly searching the cracker aisle. Nothing comes close to the "more-ish" taste of this bite of cheesy bliss. I thought, apart from those willing to smuggle me some from the land of the free, that I would have to go without the little morsels until I returned to the American lands.

Not so!

In my search for Super Bowl foods, I stumbled upon this recipe for chili and cheese crackers. "Zesty", the website promised me. "Addictive little lovelies," it promised. The recipe looked simple enough, why not?

Oh, I had no idea what joy I was setting myself up for. Out from my own oven emerged little puffs of cheesy deliciousness, close enough to the original Cheez-It that I had trouble not scarfing down the whole batch before guests arrived to try them for themselves.

Now, although my previous attempts at crackers had been fairly successful in the taste department, they lacked a certain, how do we say, "aesthetic flair". They looked like a crumbly mess. But after a bit of searching, to my accidental delight, I realized that the "holly" cookie cutter (previously used on this year's Christmas cake) was the perfect size and shape for my newfound Cheez-Its. And lo, unto us, a Cheez-It was born.

Now, the original recipe was dead-on. These things can go from delicious to burned char in the oven in no time at all. So watch these puppies. I found that 20 minutes is just about dead on in terms of timing, but of course, this will depend on your own oven. Just keep a wary eye on them, it'll be worth the effort.

Ingredients

1 cup all-purpose flour, plus more for the work surface (approx. 120 grams)
3/4 teaspoon salt
1 teaspoon crushed red chili pepper flakes
4 tablespoons unsalted butter, chilled and diced (56.7 grams for those of us on metric)
8 ounces best-quality aged Cheddar cheese, grated (227 grams)
3 to 4 tablespoons cold water

Method
1. In a bowl, whisk together the flour, salt, and chilies. Transfer to the bowl of a food processor fitted with the blade attachment. Add the butter and pulse until the mixture resembles coarse meal. Add the cheese and pulse to combine.

2. Add 3 tablespoons of the water, 1 tablespoon at a time, pulsing until the mixture comes together in a ball. Pulse in an additional tablespoon of water if needed to get the dough to hold together. Wrap the dough in plastic wrap and refrigerate for at least an hour.
3. Preheat the oven to 350°F (176°C).
4. Roll the dough out to a 1/8-inch thickness directly onto a baking sheet. (If the dough seems sticky, sprinkle the surface ever so lightly with flour.) Try to be as accurate as you can about the thickness of the dough, as the crackers won’t puff up nicely if the dough is too thin, nor will they be crispy enough if the dough is too thick. Using a cookie or biscuit cutter, a sharp knife, or a fluted pasta cutter, trim the dough into ½-inch diamonds (or any shape you prefer, such as holly).
5. Line 3 baking sheets with parchment paper. Place the dough on the parchment-lined sheets, giving them just enough room so that they are not touching. Bake until the crackers are deep golden brown and crunchy, 20 to 30 minutes, depending on the size of your crackers. Watch the crackers carefully as they go from almost done to a little too done quite quickly. 
6. Sprinkle the crackers with a light dusting of sea salt and some cayenne for an extra kick. Transfer the crackers to wire rack and let cool completely before serving. 
The crackers can stored in an airtight container for up to 1 week, although they are best the first couple of days.

Tortellini Gratinata with Mushrooms and Parsnip "Bechamel"

Baked pasta. Pasta casserole. Hot dish. All things I associate inherently with America. I swear, within each American there's some pale distant memory of a potluck at which either your mother or your neighbor's mother insisted on bringing her "world famous" tuna noodle casserole. Or baked pasta. Or...well, you get the idea. I'm fairly sure this memory never took place in reality; however, the fact that I spent my formative years in the MidWest makes the likelihood of the above even more plausible. Nothing says comfort food like some baked pasta.

Which is why, when my mother smuggled me an American copy of this month's "Bon Appetit" magazine and I saw they were doing an entire feature on the glorious American dish, I had to dust off my Midwestern genes (and jeans) and get to cooking. The promise of a faux parsnip "bechamel" sauce got me on this one. I had no idea what they were talking about but it turned out that the parsnips replaced the flour in the bechamel, keeping the thick consistency of the sauce but giving it an earthier if still starchy flavor. It was a win all around.

I also recommend getting bold with your tortellini in this recipe. The magazine called for either plain or cheese tortellini. Bah! I went with some sort of wild mushroom and stuffed sausage tortellini and in my opinion (humble as it may be), it made what can be a very bland dish (hey, we are talking about baked pasta here) into something with a little more subtlety. 

Ingredients
2 large parsnips, peeled, cut into 1/2-inch-thick rounds
2 1/2 cups whole milk, divided
1 cup freshly grated Parmesan cheese, divided
large pinch of grated nutmeg
4 1/2 tbsp butter, divided
1 1/2 lbs baby portobello mushrooms, or chestnut mushrooms, thinly sliced
2 large garlic cloves, finely chopped
2 tsp. minced fresh rosemary
2 packages tortellini (of whatever kind, should be around 18-24 oz.)
6 oz. creamy Gorgonzola cheese, cut into small pieces
1 cup chorizo sausage, cut into small pieces

Method
Cook parsnips in a medium saucepan of boiling salted water until very tender, about 20 minutes. Drain. Place parsnips in same saucepan along with 1 1/2 cups of milk. With an immersion blender, blend until smooth. Add 1 cup of milk, 3/4 cup Parmesan cheese, and nutmeg to saucepan. Blend again.

Place saucepan over heat again and simmer until reduced to about 3 cups, whisking often, about every 5 minutes. Season bechamel sauce to taste with salt and black pepper.

Melt 2 1/2 tbsp. butter in heavy large skillet over medium-high heat. Add mushrooms, garlic, and rosemary. Saute until mushrooms are brown and tender, 6-7 minutes. Season to taste with salt and pepper.

Preheat oven to 400F. Butter a 12-cup capacity baking dish. Cook pasta in large pot of boiling salted water until just tender but still firm to bite. Drain pasta, return to pot. Add remaining 2 tbsp of butter and toss to coat.

Stir in mushroom mixture and cut chorizo. Transfer pasta to prepared baking dish. Spread bechamel sauce over; sprinkle with Gorgonzola, then remaining 1/4 cup Parmesan.

Bake pasta until heated through and sauce is bubbling, 18-20 minutes. Let stand 10 minutes and serve.

Roquefort and Red Cabbage Salad

Ok, so the title might be a tad misleading. Technically this salad is supposed to be made with red cabbage, which is sweet and wonderful and photographs beautifully. Sadly, the local Tesco has not stocked red cabbage in months, if not years. So, alas, white/green cabbage it was.

Now, this is not to say that this wasn't delicious. I dare you to find me any salad that isn't made infinitely better with the addition of either bacon or cheese, but still, I feel a bit of the fraud by posting a red cabbage recipe which prominently features nothing of the kind. But ah well. If you are so lucky to live in a region with the rich bounty of red cabbage, please, do partake, and think of me when you do.


Roquefort and Red (ahem, white) Cabbage Salad

Ingredients
1/4 red (or white) cabbage, central core removed, thinly sliced
4 tbsp red wine vinegar
50g caster sugar
600ml water
100g streaky bacon (normal bacon for the Americans out there), cut into 2cm dice
2 slices of white bread, cut into 1cm cubes
1 garlic clove, crushed
2 heads of chicory (endive)
1 small head of radicchio
150g Roquefort (or any blue cheese) crumbled

for the Vinaigrette 
4 tbsp red wine vinegar
1 tsp Dijon mustard
4 tbsp walnut oil
4 tbsp olive oil
2 tbsp walnuts, roasted and broken into chunks
salt and pepper

Method

Put the cabbage in a bowl. Bring the vinegar to the boil, add the sugar and, once dissolved, pour it over the cabbage and stir well. Boil the water and pour that over the cabbage too. Leave to soak for 5 minutes, then drain in a colander and leave to cool.

Heat a frying pan over a high heat, add the bacon and cook it until it is crisp and the fat has been released. Add the bread and fry until golden, then stir in the garlic and fry for 1 minute.
Remove from heat.
Put the red cabbage in a salad bowl with the chicory and radicchio leaves, scatter over the bacon and croutons and the Roquefort cheese.
Whisk together all the ingredients for the vinaigrette and pour it over the salad.
Toss well, adjust the seasoning and serve.

Root Vegetable Gratin

Another slightly horrific picture of a gratin, I apologize. There's just not other appropriate way for me to display the cheesy glory that is this recipe (similar to, I imagine, any gratin dish). Again, I have to cite the "Recipes for Health" section of The New York Times as my inspiration.
It's cold here in England. Very cold. January cold.
Which makes it the perfect time of year to celebrate the perhaps coldest section of the United Kingdom: Scotland.
Yes, that's right, once a year, the Brits pay homage to that most indecipherable of poets, Robbie Burns, Scotland's national hero. Perhaps because this is the time of year when most of Britain resembles Scotland: cold, dark, and slightly tipsy.
But, as only the Scots can, they make a merry night of it. Burns' Night, as it's called, involves a great feast and Scottish dancing (called a ceilidh, though just try to say that phonetically). 
And what better way to celebrate Scotland than to sample some of Scotland's most famous fare? That's right. Haggis. As Robin Williams says, I'm pretty sure that most Scottish cuisine was based on a dare. Innards and oats, you say? Sign me up!
But seriously, it's delicious. It's warming, it's filling, perfect for cold, dark, slightly tipsy nights such as these. And while haggis is traditionally served with "nips and tatties" (no, not that. I mean, roasted parsnips and cabbage. Get your mind out of the gutter!), I thought we could change the recipe slightly and throw some cheese and milk in with the mix. Hey, the Recipes for Health people recommended it. Who am I to disagree about its apparent "healthiness"?
Whether you're serving this with sheep innards or not, this is a great winter dish and amazingly easy to make. The timing can throw off things, but I cut corners and was able to get this dish out in less than hour (despite what the recipe may say).
G'un robh math agad! (or something to the effect)

Ingredients

1 1/2 pounds combination of parsnips and swede, peeled and sliced thin (or a combination of turnips, kohlrabi, rutabaga, large parsnips) 

Salt and freshly ground pepper

2 teaspoons fresh thyme leaves (or dried)

3/4 cup grated Gruyère cheese (3 ounces)

1 1/2 cups low-fat (1 percent or 2 percent) milk

Method

1. Preheat the oven to 400 degrees. Butter a 2-quart gratin or baking dish. Place the sliced vegetables in a large bowl, and season generously with salt and pepper. Add the thyme, and toss together.

2. Arrange the vegetables in the gratin dish. Add the milk, season with more salt and pepper if you wish, and place in the oven on the middle rack. Bake 45 minutes (I did this in 35 min); every 15 minutes, press the vegetables down into the milk with the back of your spoon. Add the cheese, and stir in carefully to incorporate. Return to the oven, and bake another 30 to 45 minutes (again, I cheated and did this for 25 minutes), stirring or pressing the vegetables down with the back of your spoon every 10 minutes until the gratin is nicely browned and most of the liquid is absorbed. Remove from the heat and serve, or allow to settle and serve warm.

Serves four.

Gorgonzola Apple Quiche + Tart Dough

Quiche. Strikingy elegant (nothing says class like pastry dough) and yet amazingly humble. Quiches are ubiquitous now on lunch menus both in the States and in England. They can be served warm or cold, alone or with a salad, and, really, (in my opinion) are appropriate at any part of the day. Tea time? Quiche! Breakfast? Quiche!

Anyway, so you now understand my abiding love of this French dish, but it was only recently that I tried making one (or rather two) for myself. Despite my ongoing love of French pastry, I have a healthy ongoing fear of it. It seems so delicate. Any one of a thousand things can go wrong with it. It also takes patience. Almost every pastry dough will require at least a few hours of fridge time. And, honestly, most of the time, I don't have the patience for it. Not when there's quiche on every corner now.

But, on a whim, and thanks to the Around My French Table cookbook, I decided it was time to try my hand at it. The quiche dough was, as predicted, tricky to figure out. I made two batches. The first came out beautifully. The second was a crumby mess. Even after some time in the fridge, it didn't resemble the moist yet delicate dough that I was hoping for. In a moment of panic, I decided to use cold tap water to get the crust to hold together. This was sacrilege, I know. But, to be fair, after I baked it, you couldn't tell the difference. And, to me, that's all that matters.

Getting off the subject of dough, I will also say that, while this recipe is delicious, go crazy with the blue cheese/gorgonzola. Greenspan calls for 2 ounces of the stuff. Bah! That's barely a hint of the stuff. I put in twice the amount and still thought it needed more blue cheese flavor. But, of course, use your own judgment on this one. 

Note: I've included the basic "Tart Dough" that Greenspan uses for her quiches below. It should work on most savory pastry dishes and the recipe makes enough dough for 1 9 - 9 1/2 inch tart shell. 

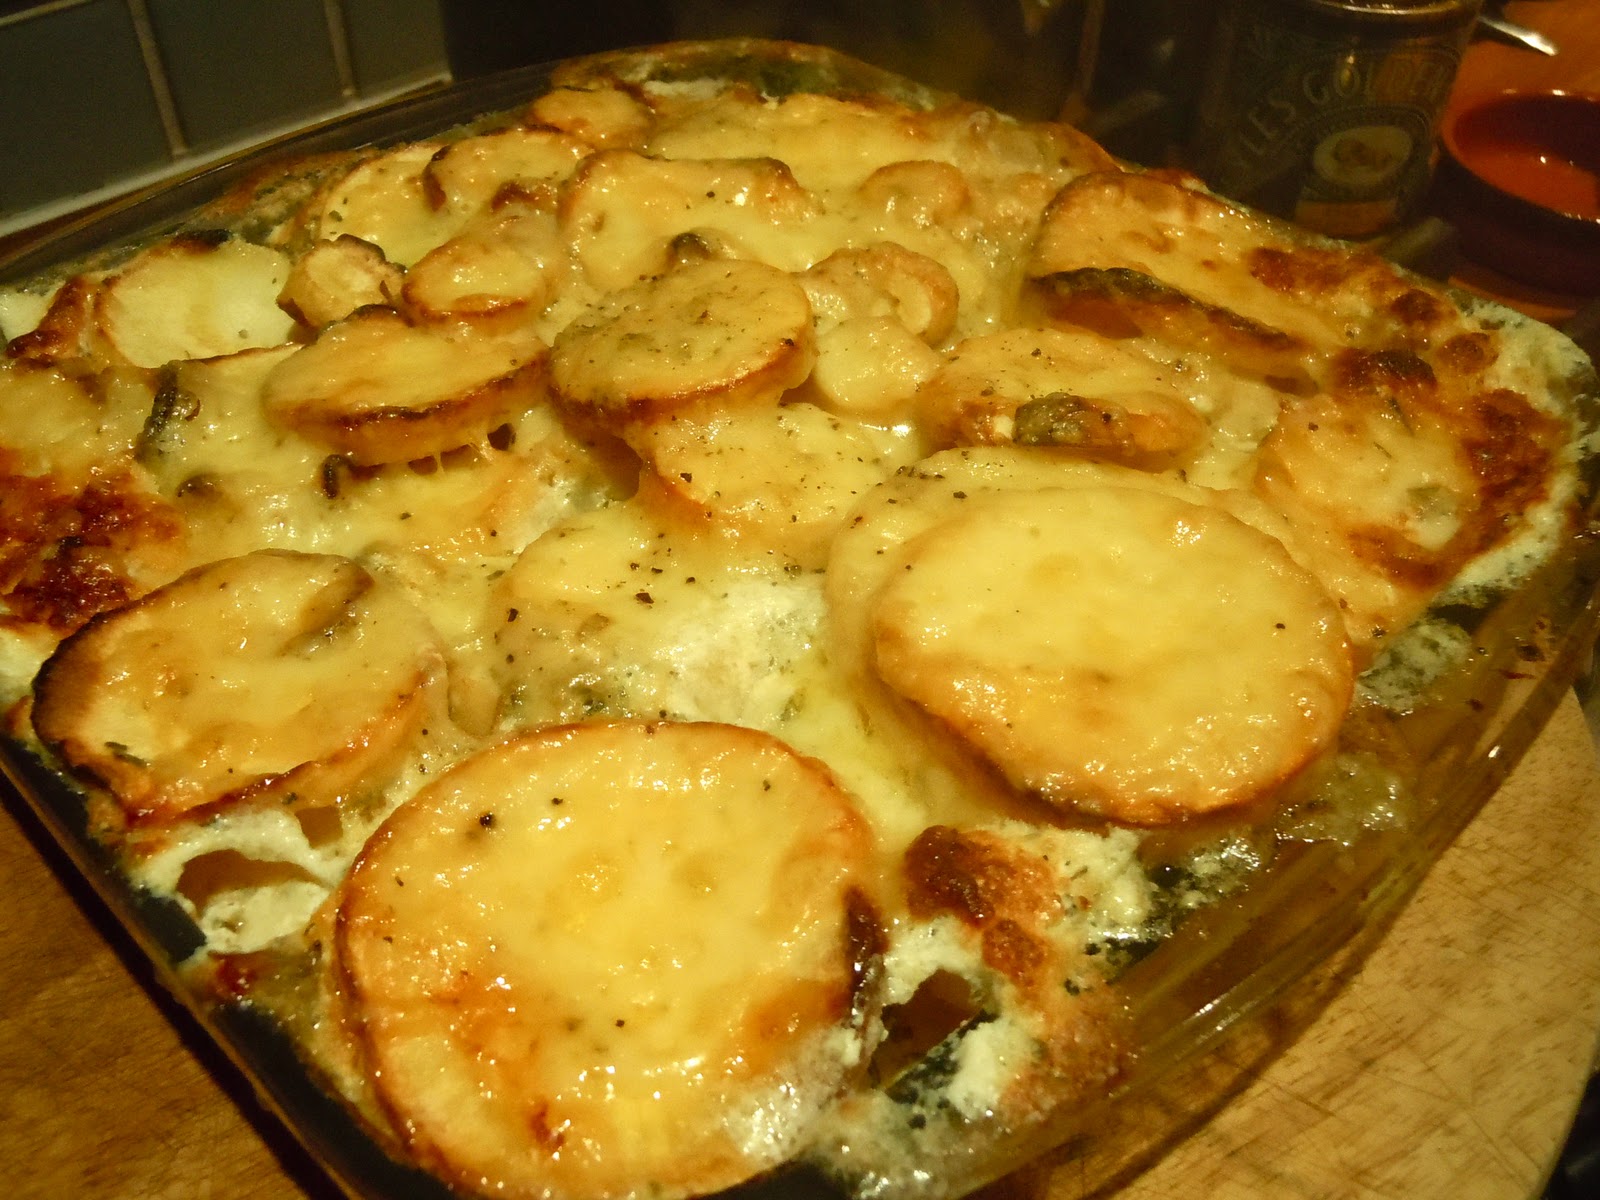
Gorgonzola-Apple Quiche

Ingredients
1 tbsp. unsalted butter
1 small onion, finely chopped
Salt and freshly ground white pepper
1 9 - 9 1/2 inch tart shell made from Tart Dough recipe (see below), partially baked and cooled
1 apple (tart-sweet works best, such as Empire or Gala), peeled, cored, and cut into small dice
2 ounces Gorgonzola dolce (I used 4 ounces or more. Go crazy with the cheese!)
2/3 cup heavy cream
2 large eggs

Method
Center a rach in the oven and preheat the oven to 400 degrees F. Line a baking sheet with a silicone baking mat or parchment paper.

Melt the butter in a small skillet over low heat and toss in with the onion. Season the onion lightly with salt and white pepper and cook until it is very soft but not at all colored, about 10 minutes. Remove from the heat.

Put the tart shell on the lined baking sheet. Spread the onion, wiht whatever buttern remains in the pan, evenly over the bottom of the crust. Scatter the apple over the onion. Cut the Gorgonzola into small cubes and scatter it over the onion and apple. Beat the cream and eggs together until well blended, season with salt and white pepper, and pour into the tart shell.

Gently slide the baking sheet into the over and bake for 30 to 40 minutes or until the filling is uniformly puffed (wait for the center to puff), browned, and set (mine took at least 45 minutes). Transfer the quiche to a cooling crack and allow it to cool and gather itself for 5 minutes or so.

Carefully remove the sides of the pan and slide the quiche onto a platter if you want to serve it hot, or onto a rack if you want to cool it. Serve hot, warm, or at room temperature.

Serving: You can keep the quiche lightly covered on the counter for a few hours if you're going to serve it at room temperature. If you want to keep it overnight, wrap it well and store it in the refrigerator. It's best to bring it to room temperature or t warm it briefly in a moderate oven before serving.
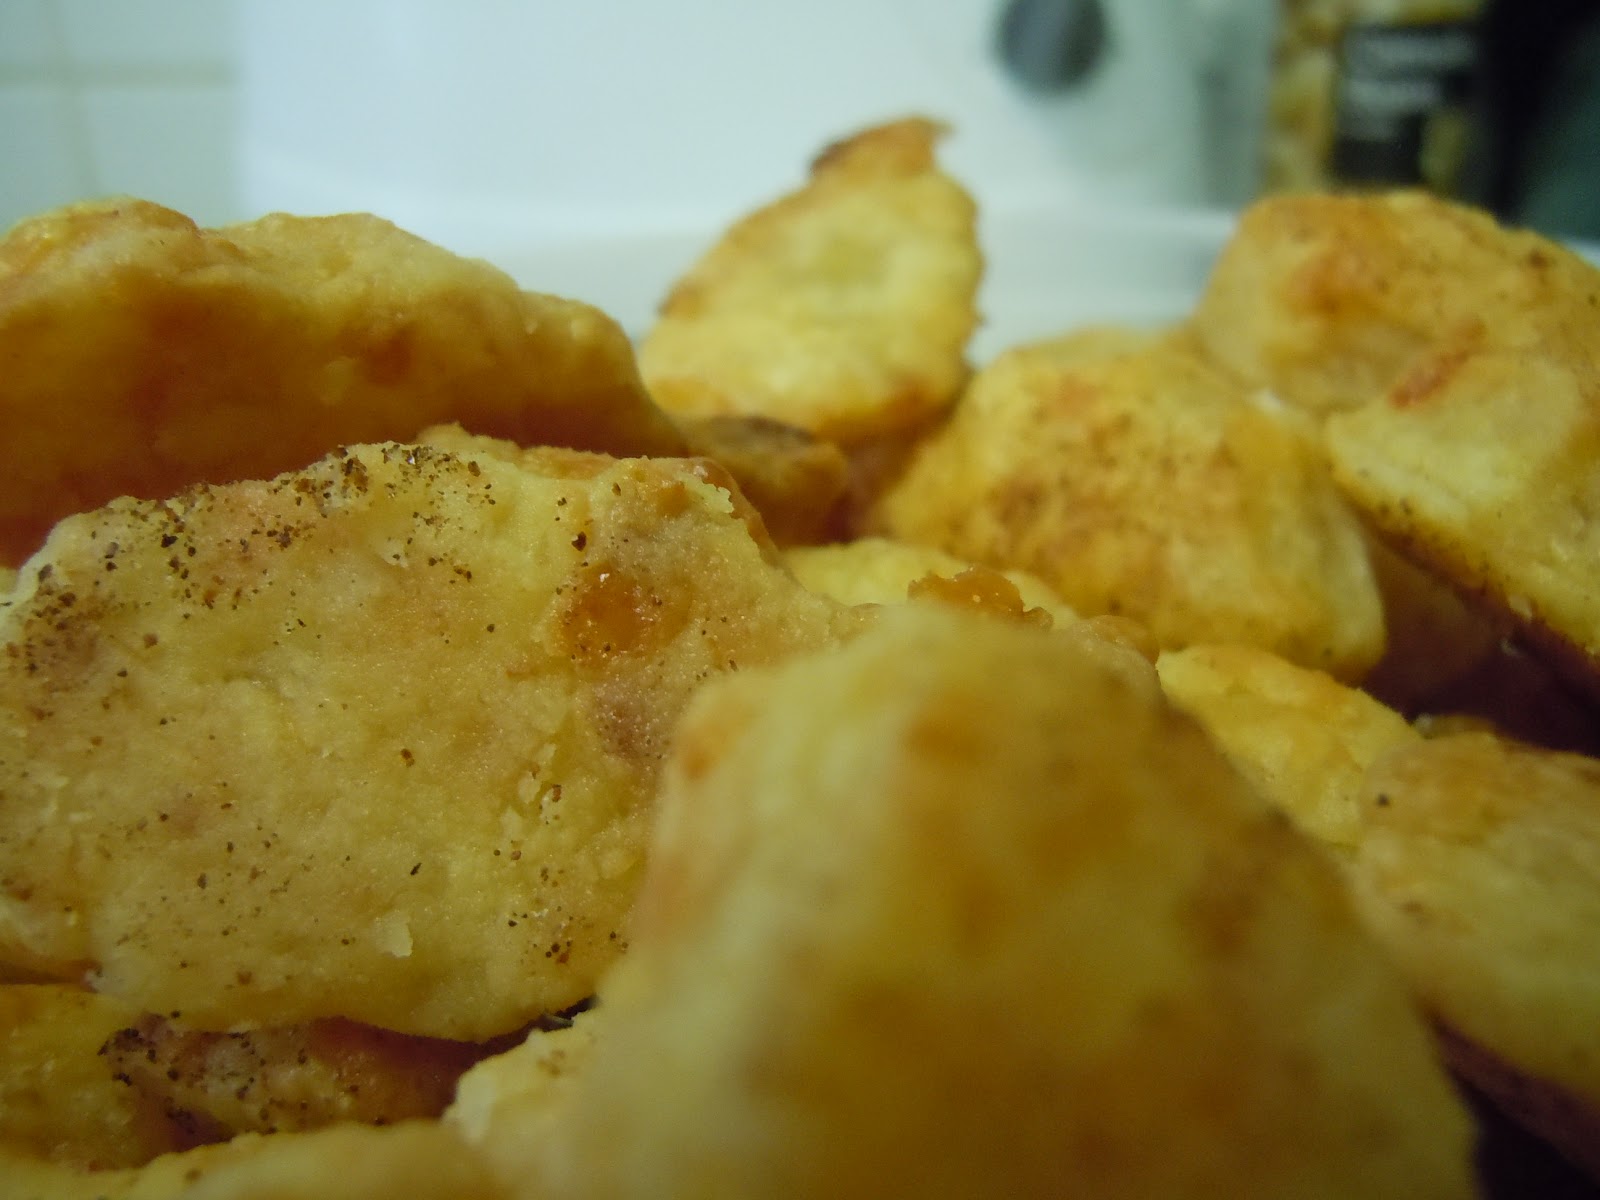
Tart Dough
Makes 1 9- 9 1/2-inch tart shell

Ingredients
1 1/4 cup all-purpose flour
1 tsp. sugar
1/2 tsp. salt
6 tbsp. (3/4 US stick) very cold (or frozen, see note) unsalted butter, cut into bits
1  large egg
1 tsp. ice water

Note on butter: A friend of mine gave me great advice when it comes to incorporating butter into dough. Instead of spending time cutting it into bits, put the butter in the freezer for a few hours and then use the grater on it. The butter will shave into nice small, manageable pieces that serve the exact same purpose as cutting it up by hand.

Method
To make the dough in a food processor: Put the flour, sugar, and salt in the processor and whir a few times to blend. Scatter the bits of butter over the flour and pulse several times, until the butter is coarsely mixed into the flour. Beat the egg with ice water and pout it into the bowl in 3 additions, whirring after each one (Don't overdo it- the dough shouldn't form a ball or ride on the blade). You'll have a moist malleable dough that will hold together when pinched. Turn the dough out onto a work surface, father it into a ball and flatten it into a disk.

To make the dough by hand: Put the flour, sugar, and salt in a large bowl. Drop in the bits of butter and, using your hands or a pastry blender, work the butter into the flour until it's evenly distributed. You'll have large and small butter bits, and that's fine; uniformity isn't a virtue here. Beat the egg and water together, drizzle over the dough and, using a fork, toss the dough until it is evenly moistened. Reach into the bowl and, using your fingertips, mix and knead the dough until it comes together. Turn it out onto a work surface, gather it into a ball and flatten into a disk.

Chill the dough for at least 3 hours (but it can be refrigerated up to 5 days).
When you're ready to make the tart shell, butter a 9 - 9 1/2 inch tart pan with a removeable bottom (butter it even if it is nonstick).

To roll out the dough:
Either between two sheets of wax paper or plastic wrap, or on a lightly floured surface, roll out the dough to 12 inches in diameter and about 1/4 inches thick.

Transfer dough to tart pan, easing it into the pan without stretching it. Press the dough against the bottom and up the sides of the pan. If you'd like to reinforce the sies of the crust, you can fold some of the excess dough over, so that you have a doubl thickness around the sides. Using the back of a table knife, trim the dough even with the top of the pan. Prick the base of the crust in several places with a fork.

Chill, or freeze, the dough for at least 1 hour before baking.

To partially bake the crust: Preheat an oven to 400 degrees F. Press a piece of buttered foil (or use nonstick foil) against the crust's surface. If you'd like, you can fill the covered crust with rice or dried beans (or special baking beads if you have them) to keep the dough flat, but this isn't really necessary if the crust is well chilled. Line a baking sheet with a silicone baking mat or parchment paper and put the tart pan on the sheet.

Bake the crust for 20 minutes in the center of the oven, then carefully remove the foil (with rice or beans). Return the crust to the oven and bake for another 3-5 minutes, or until it is lightly golden. Transfer the baking sheet to a cooling rack and allow the crust to cool before you fill it.